
How to carve an Iberico ham (and a shoulder) step by step
The Castanoble team · 9 min read
Published on 6 November 2017 · Updated on 5 October 2026
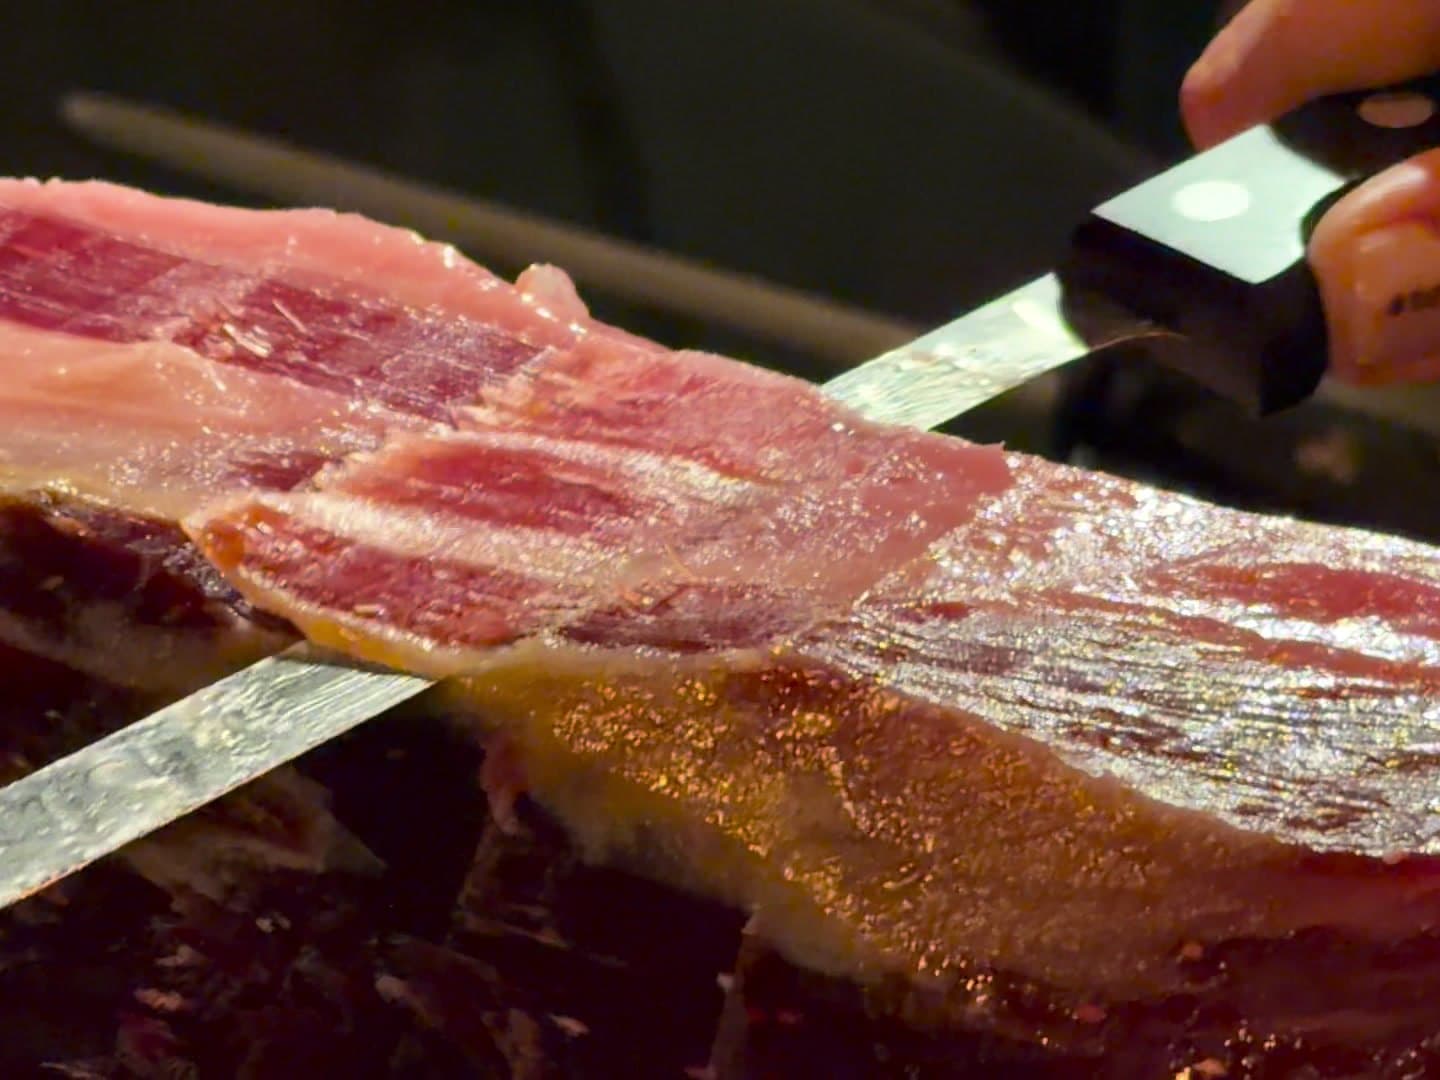
A well-carved ham tastes better than the same ham badly carved. A thin, small slice warms in the mouth and releases its fat and aroma; a thick one has to be chewed and only half delivers. You do not need to be a professional carver to do it well at home: you need the right tools, the piece held firmly and a method. This is the Castanoble carving manual, step by step and with its drawings.
The Castanoble carving manual, with its illustrations, to print out or keep handy next to the ham stand. 4 pages · 0.9 MB.
Download the manual as a PDF (in Spanish)The tools
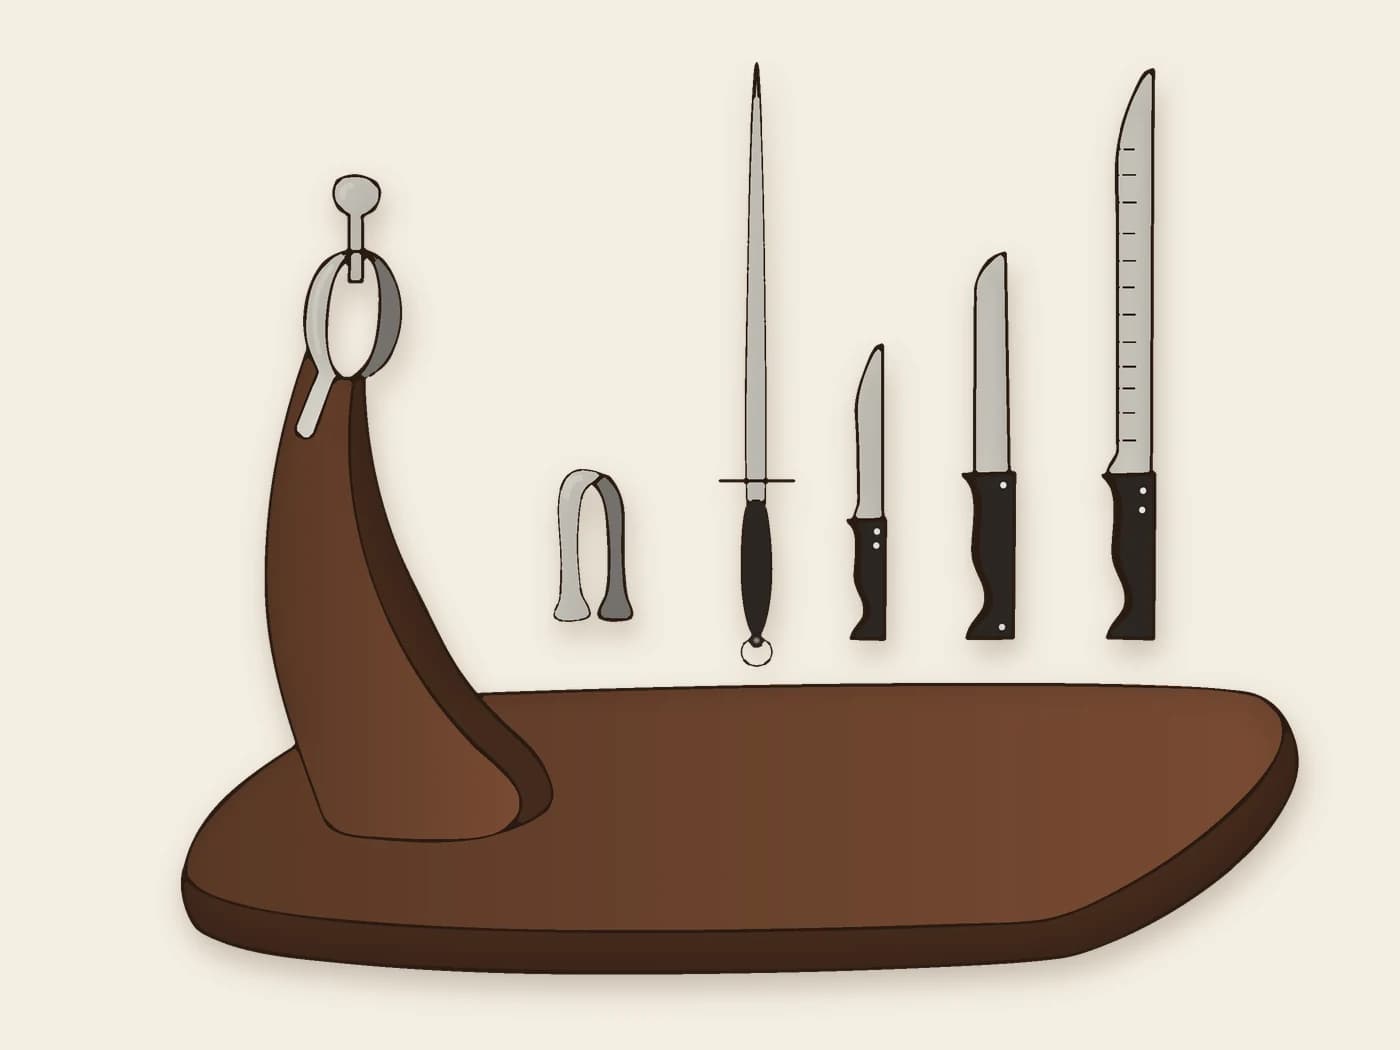
- Ham stand: the holder the ham sits on. It has to be sturdy: if the piece moves, you can neither carve thinly nor carve safely.
- Tongs: for picking up the slices without touching them with your fingers.
- Honing steel: for setting the edge of the knives before you start.
- Boning knife: short, narrow and sturdy blade. This is the one that works around the bones.
- Skinning knife: broad, sturdy blade, for removing the rind and the outer fat.
- Ham knife: narrow, long and flexible blade. This is the one that cuts the slices, and it is used for nothing else.
The parts of the ham
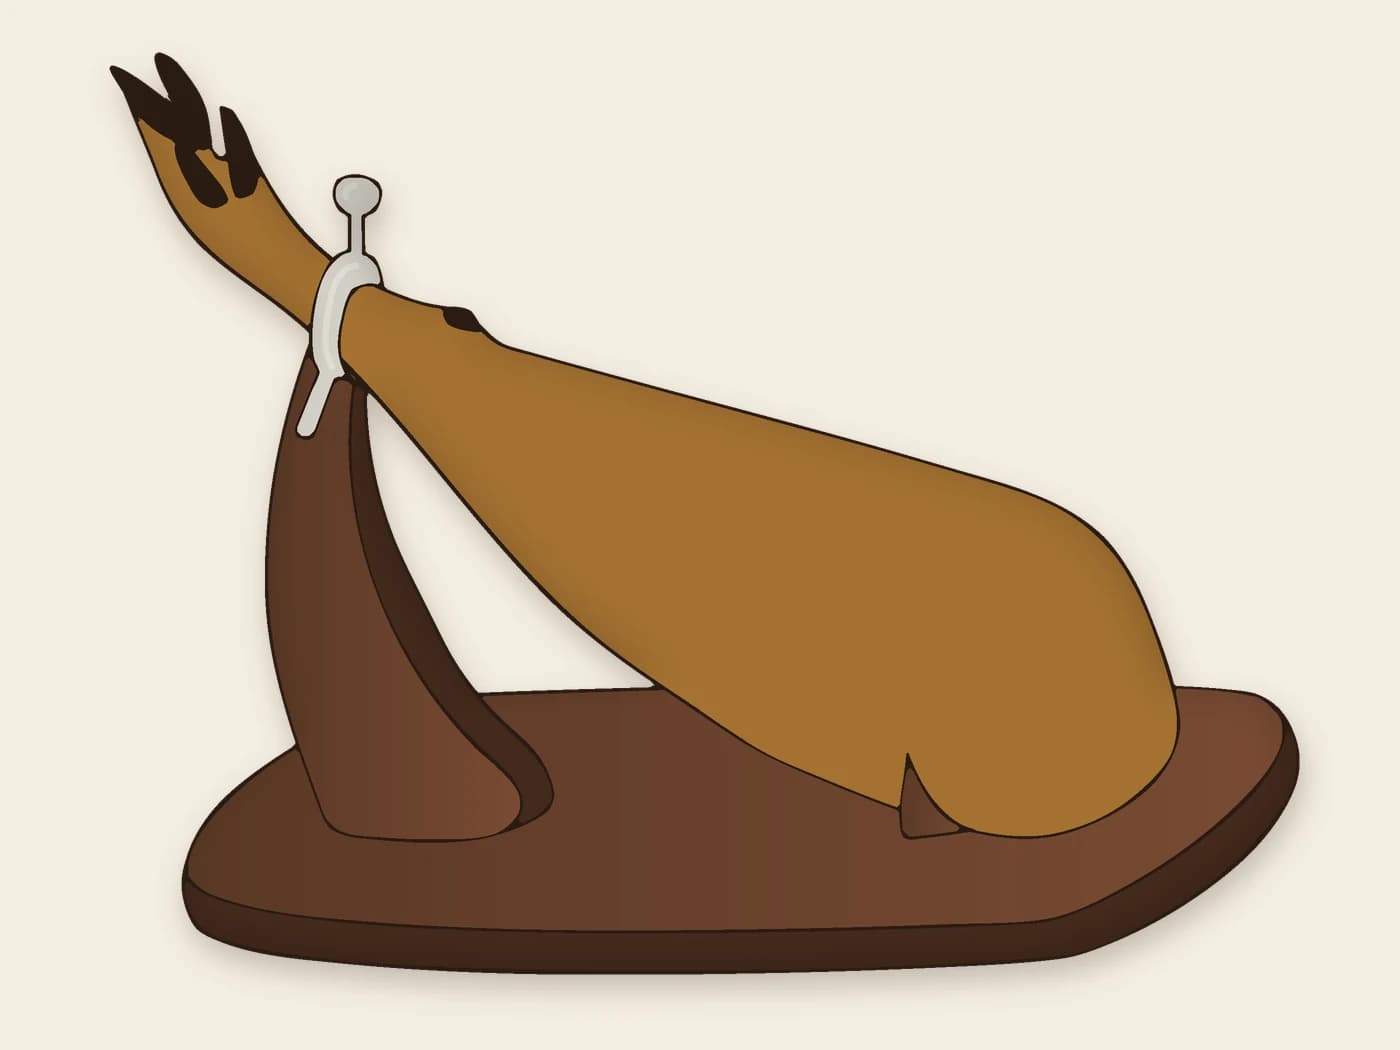
- Cushion (maza): the bulging side, with more meat and more marbled fat. It is the juiciest part and yields the best slices.
- Contra (babilla): the opposite side, narrower. It has less fat, so it is slightly more cured and dries out sooner.
- Tip (punta): the end opposite the hoof. Very flavourful, with good fat.
- Hock and shank (jarrete and caña): the area close to the hoof. More fibrous meat, full of flavour.
Before you start: where and how
Where to start depends on how long the ham is going to last. If it is going to be eaten quickly, within one to three days, place it with the hoof facing upwards and start with the cushion. If it is going to be eaten slowly, place it with the hoof facing downwards and start with the contra: this way the ham stays fresher, because the contra is the part that dries out first and the cushion keeps better.
- Run the ham knife along the sharpening steel, at an angle of about 20°, to hone the edge. A knife that doesn't cut forces you to apply pressure, and pressure is what causes accidents.
- When you begin, remove the rind only from the part you are going to eat. What keeps its rind stays in good condition; what is skinned dries out.
- Never put your hand in the path of the knife: the hand that isn't cutting always stays above and behind the blade.
- Always hold the blade of the ham knife flat, parallel to the cutting surface.
- Always work in the same direction, usually from top to bottom: from the hoof towards the tip.
- The slices should be thin and small, 6 or 7 centimetres, and laid on the plate in a single layer.
Carving in 7 steps
The steps follow the order of the guide: hoof facing upwards and starting with the cushion. If you have placed the ham with the hoof facing downwards to start with the contra, swap the order of the two sides:
- Step 1 is done in the same way, but skinning the contra.
- Then come steps 4 and 5, without turning the ham or skinning again: the contra is already on top and skinned.
- Next, turn the ham 180° and carry out steps 2 and 3, skinning the cushion first.
- Finish with steps 6 and 7. In this order, the hip bone appears first on the contra side and then again on the cushion side.
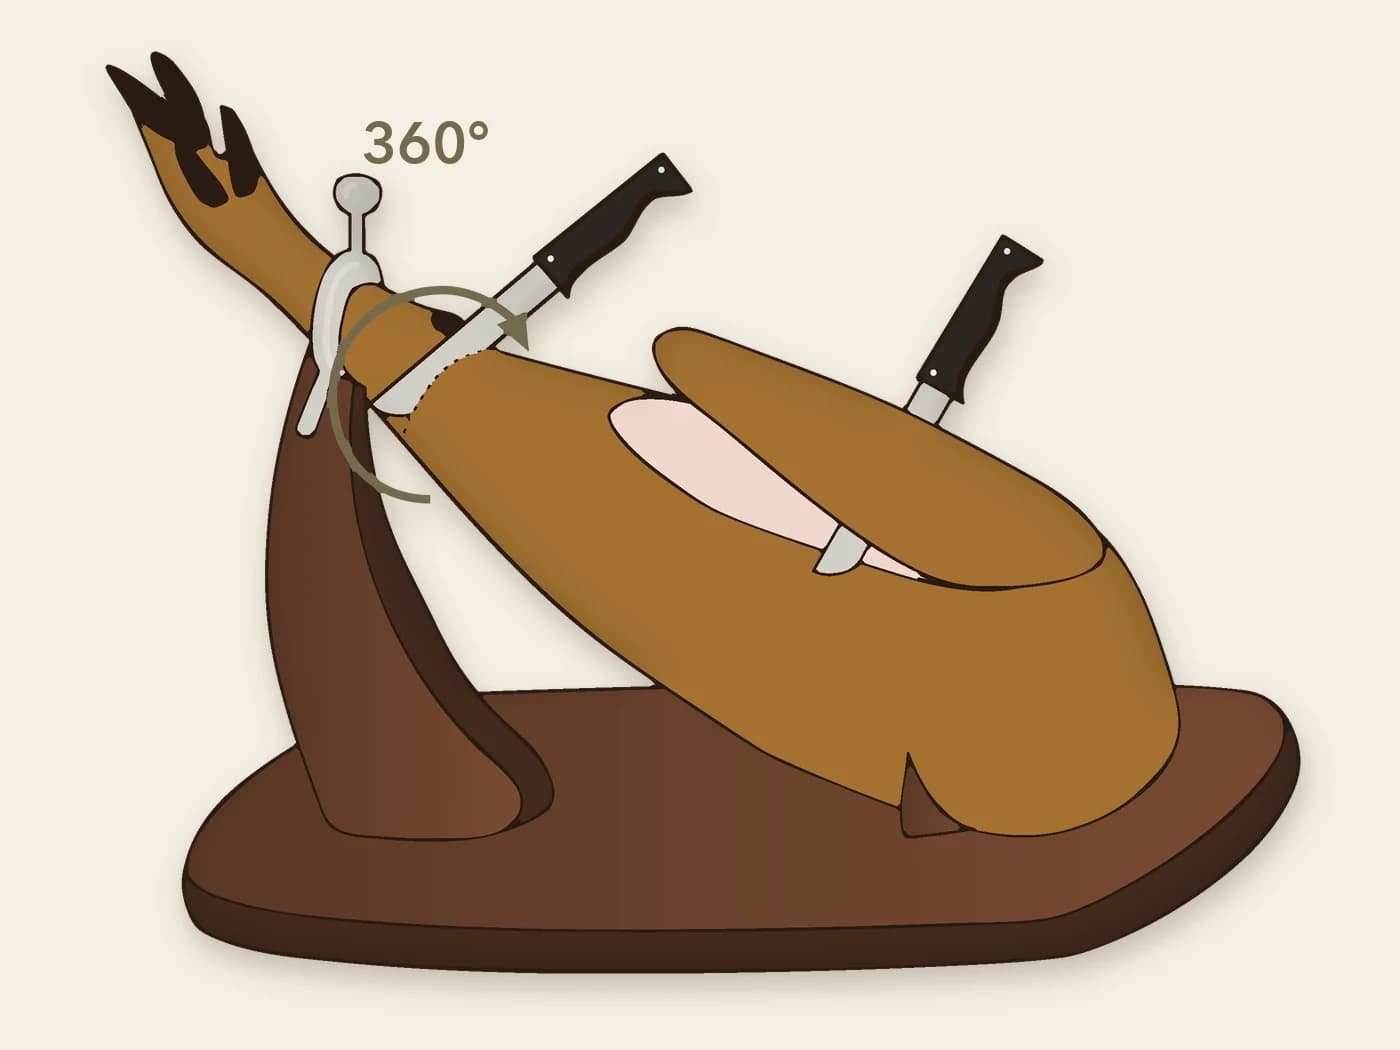
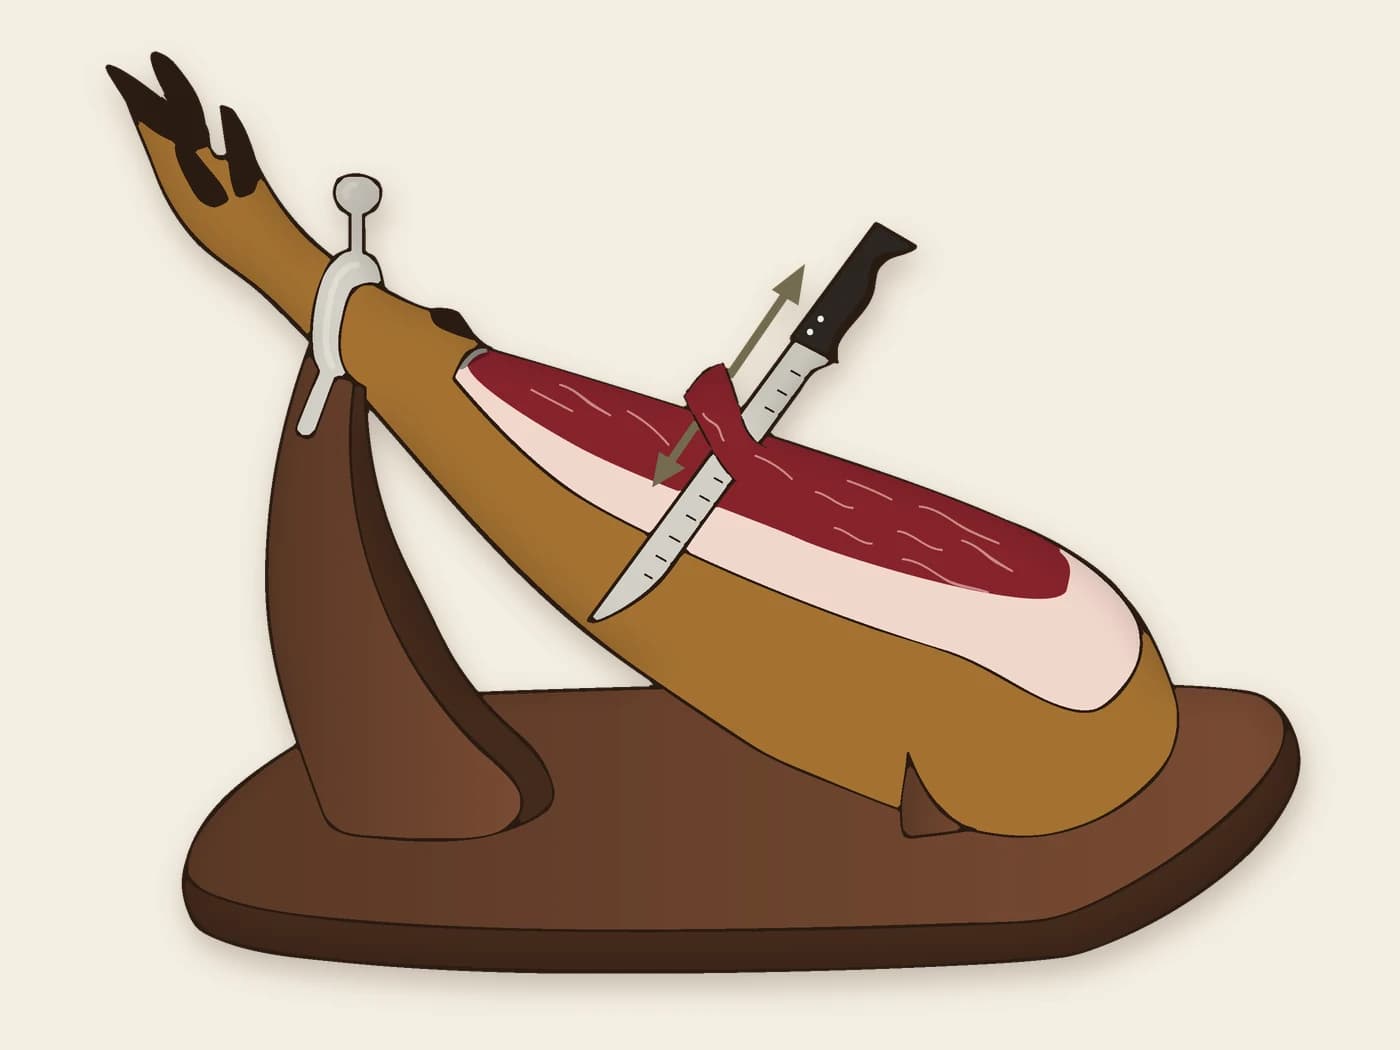
Step 1: Score the shank and skin the cushion
With the skinning knife, make a 360° diagonal cut in the shank area, around the bone. With the same knife, skin the cushion only in the area you are going to cut (the whole of it only if the ham will be finished within a few days): first the rind and the yellowish outer fat; then the clean fat, white or pinkish, until the lean meat shows through. Keep a couple of strips of that clean fat: you will need them at the end.
Step 2: Slice the cushion
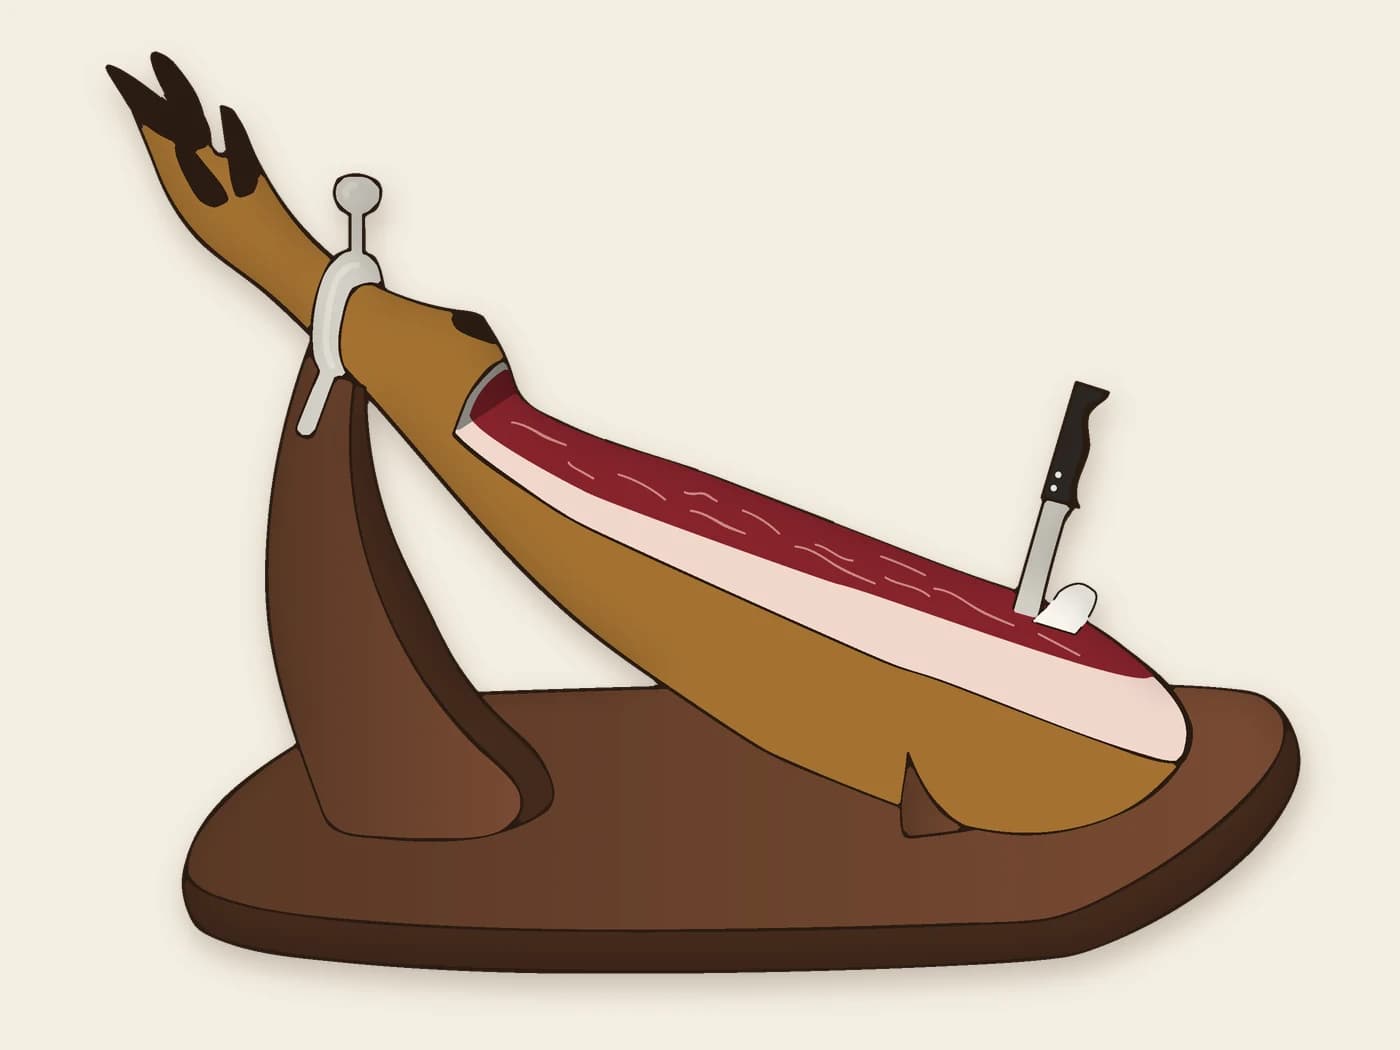
Rest the ham knife with the blade flat, parallel to the cutting surface, never digging in at an angle. The blade moves with a short, gentle back-and-forth motion, without pressing, so that the edge does the work; and the cut always progresses in the same direction, from top to bottom: from the hoof towards the tip. Remove the slices with the tongs. Lower the whole surface evenly, so that the cut is always a straight, flat plane.
Step 3: Cut around the hip bone
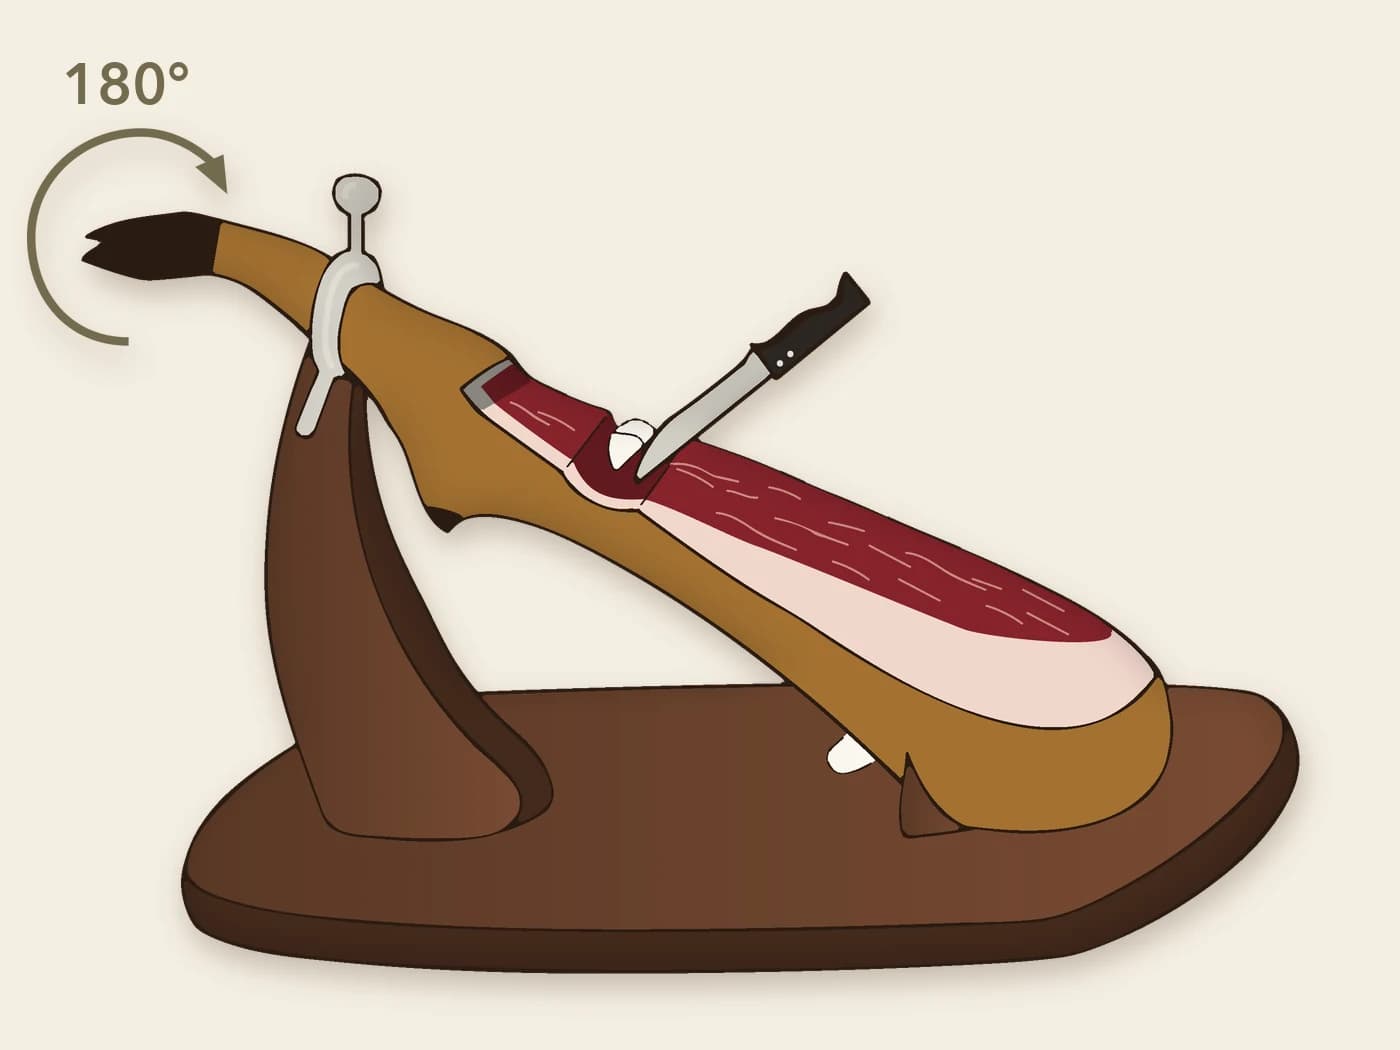
When the hip bone appears, sink the boning knife in close to the bone and cut deeply around it, so that the meat comes away from it. The bone is not removed: it is left scored, so that the slices come away cleanly when you reach it. Keep slicing until you have used all the lean meat on the cushion.
Step 4: Turn the ham and slice the contra
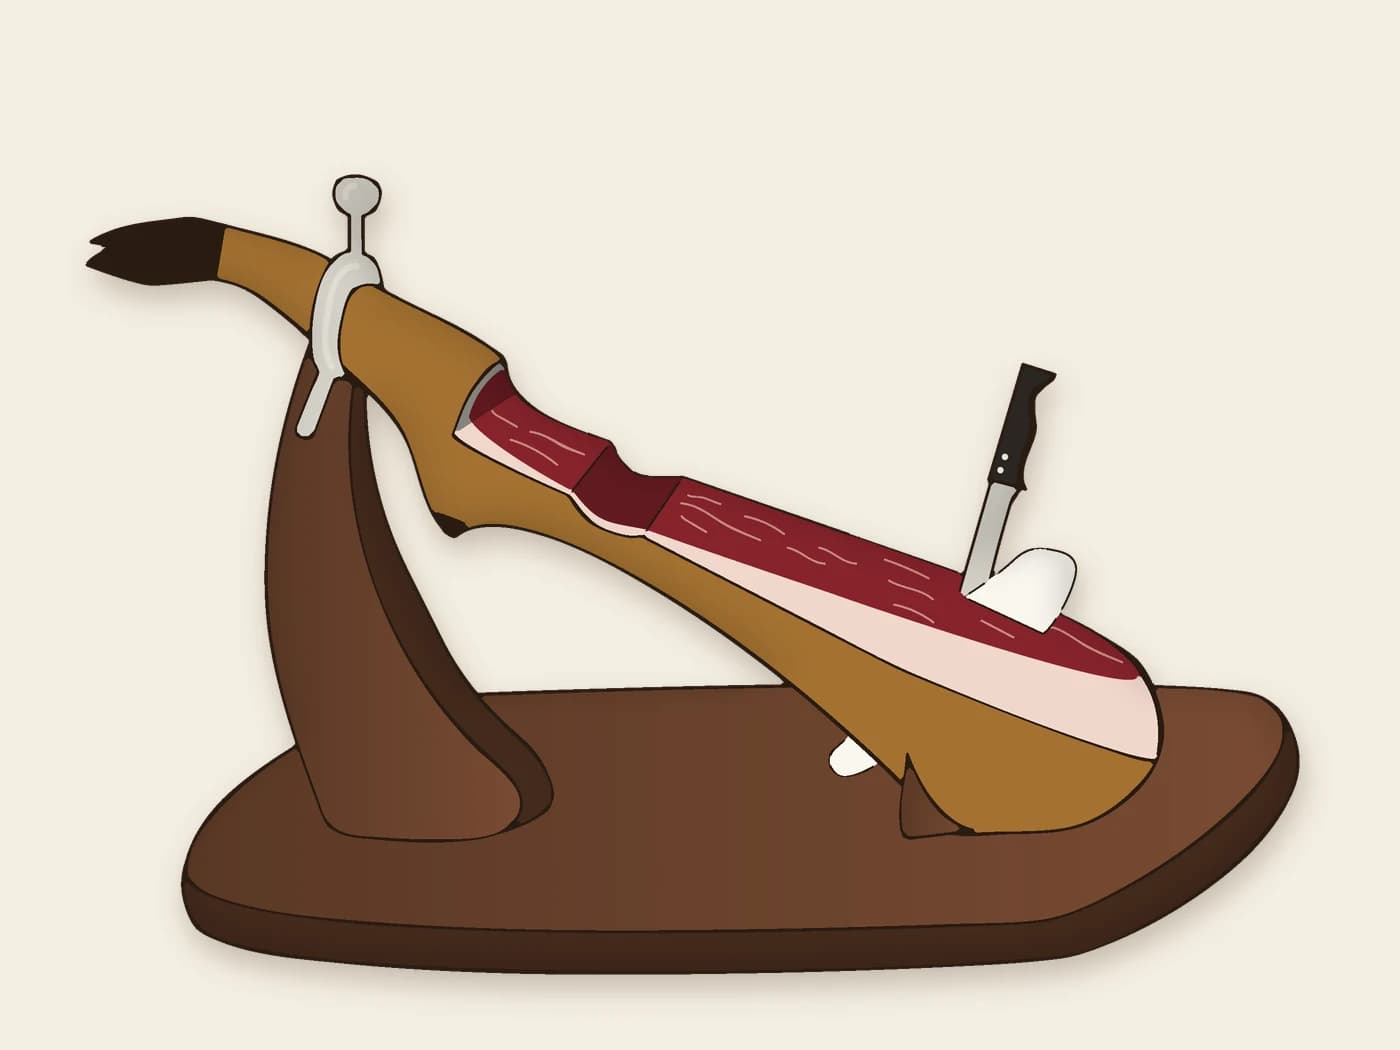
Turn the ham 180°, tighten the clamp firmly again, skin the contra as you did the cushion and slice it in the same way. When the kneecap appears, remove it with the boning knife: a U-shaped cut around the bone and then, with the same knife, lever it out without forcing it: if it doesn't come out, cut deeper. Then carry on slicing.
Step 5: The hip bone, from the other side
The hip bone will appear again, this time on the contra side. Cut around it once more with the boning knife, with a deep cut close to the bone, and carry on slicing.
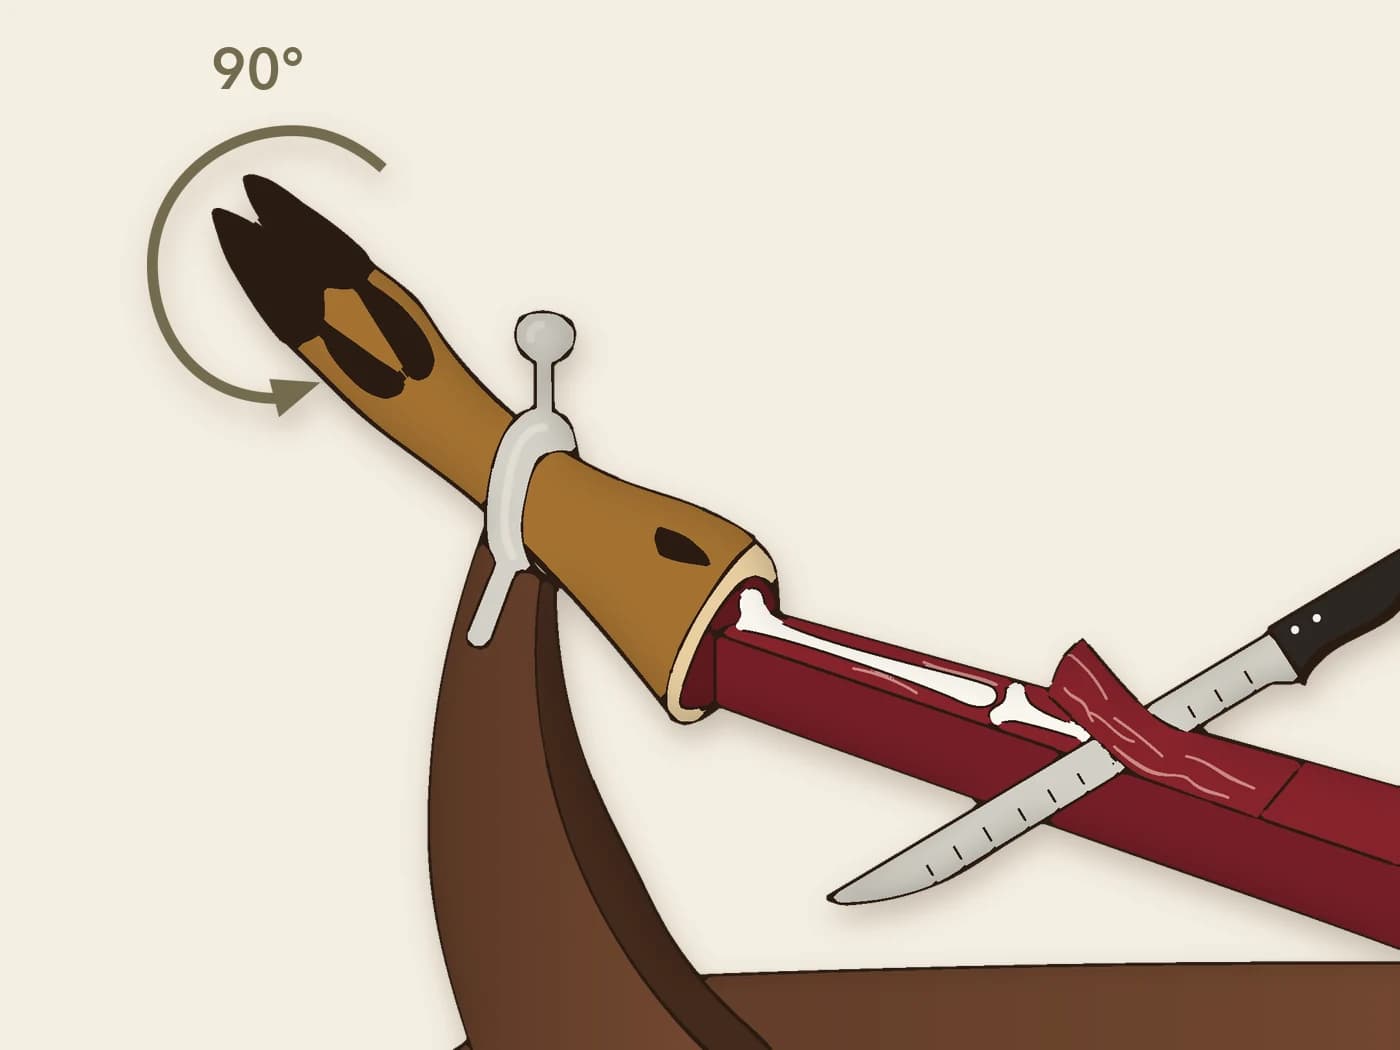
Step 6: The hock
To cut the hock area, turn the ham 90°. Cut with the ham knife, from top to bottom as with the rest of the ham, until the fibula appears, the thin bone that lies alongside the tibia. After turning it, tighten the clamp again.
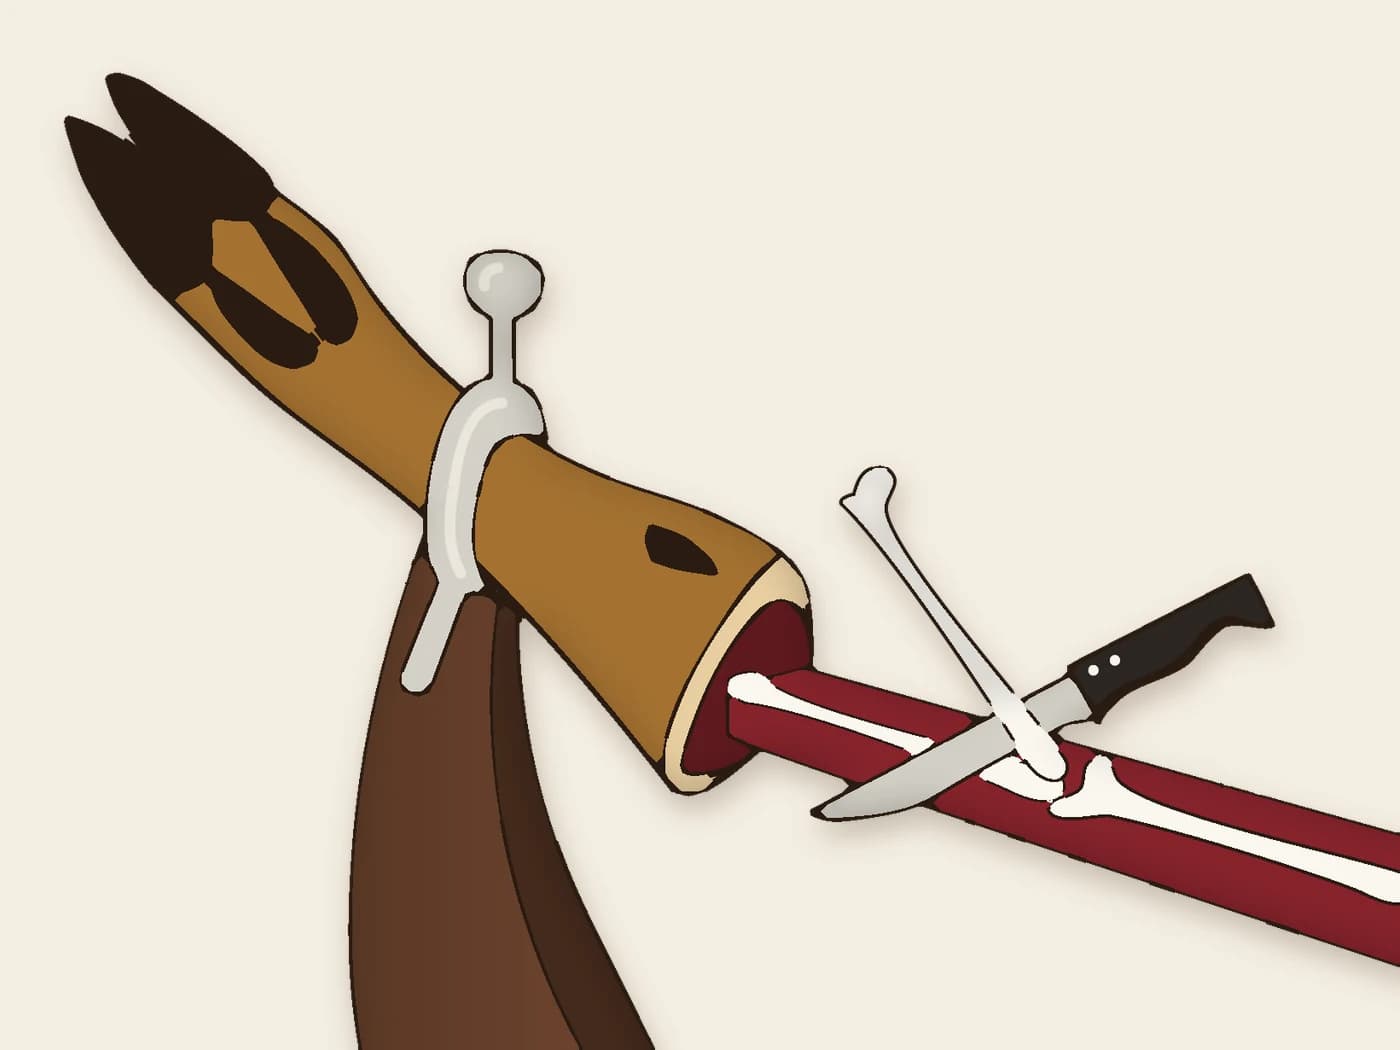
Step 7: Between the tibia and the fibula
With the boning knife, separate the tibia and the fibula to make the most of the meat between them. Levering gently, without forcing it, remove the fibula, the thin bone, and carry on cutting until all the meat on the ham is finished.
Cubes and shavings: all the meat stuck to the bone that could not be taken off in slices is removed with a knife. The chunkier bits are used as cubes and the finest as shavings, to eat as they are or for cooking. And the bone makes the best stock of the winter: it is cut up with a saw, or the shop can cut it for you; never with the knife.
When you have finished: serving and storing
- Ham is best eaten at between 20 and 25 °C. When cold, the fat is hard and has no aroma: if the piece is kept somewhere cool, leave the plate at room temperature for a few minutes before serving.
- Only carve what is going to be eaten: sliced ham starts to dry out within minutes.
- When you have finished, cover the cut surface with the strips of clean fat you set aside at the start and cover the piece with a cotton cloth or a ham cover.
- Until the next time you carve, keep it at between 14 and 18 °C, in a dry place out of direct sunlight. Not in the fridge.
How to carve a shoulder
The shoulder is the front leg and is carved by the same rules: the blade flat on the cut surface, thin, small slices, and only remove the skin from what is going to be eaten. Three things change, and it is worth knowing them before you start.
- It has less meat and more bone in proportion, and the bone is closer to the surface. The slices come out smaller, and that is normal.
- Its bones are different: instead of the hip there is the shoulder blade (the scapula), a flat, wide bone that has to be outlined with the boning knife earlier and more often; there is no kneecap, and in the shank area are the radius and the ulna.
- It dries out sooner, because it is thinner. Remove even less skin each time and do not leave it uncovered.
In return for that effort, the shoulder has a more intense flavour and is more manageable in a small household: it weighs considerably less than a ham and is finished sooner.
The most common mistakes
- Carving thick slices. It is the most frequent mistake and the one that changes the flavour most.
- Removing the skin from the whole piece on the first day. After a week, half of it is dry.
- Carving only from the centre and leaving the edges high: they dry out and go to waste. The cut should always be a straight, level surface.
- Cutting long slices. They are not more elegant: they are harder to eat and almost always thicker.
- Carving with a blunt knife. It forces you to press hard, and a knife that slips under pressure is the classic accident.
- Throwing away the clean fat from the start. It is what protects the cut surface until the next day.
How much you get from a piece
From a ham you get around half its weight in slices; from a shoulder, somewhat less, close to 40%. The rest is bone, rind and trimmed fat. If there are only a few of you at home or you do not fancy carving, there are two equally good options: the boneless piece or ham that is already sliced and vacuum-packed, which keeps for months unopened.
The Castanoble carving manual, with its illustrations, to print out or keep handy next to the ham stand. 4 pages · 0.9 MB.
Download the manual as a PDF (in Spanish)Now you know how to carve it. Next, choose your ham.
View hams and shoulders